Monday, March 31, 2014

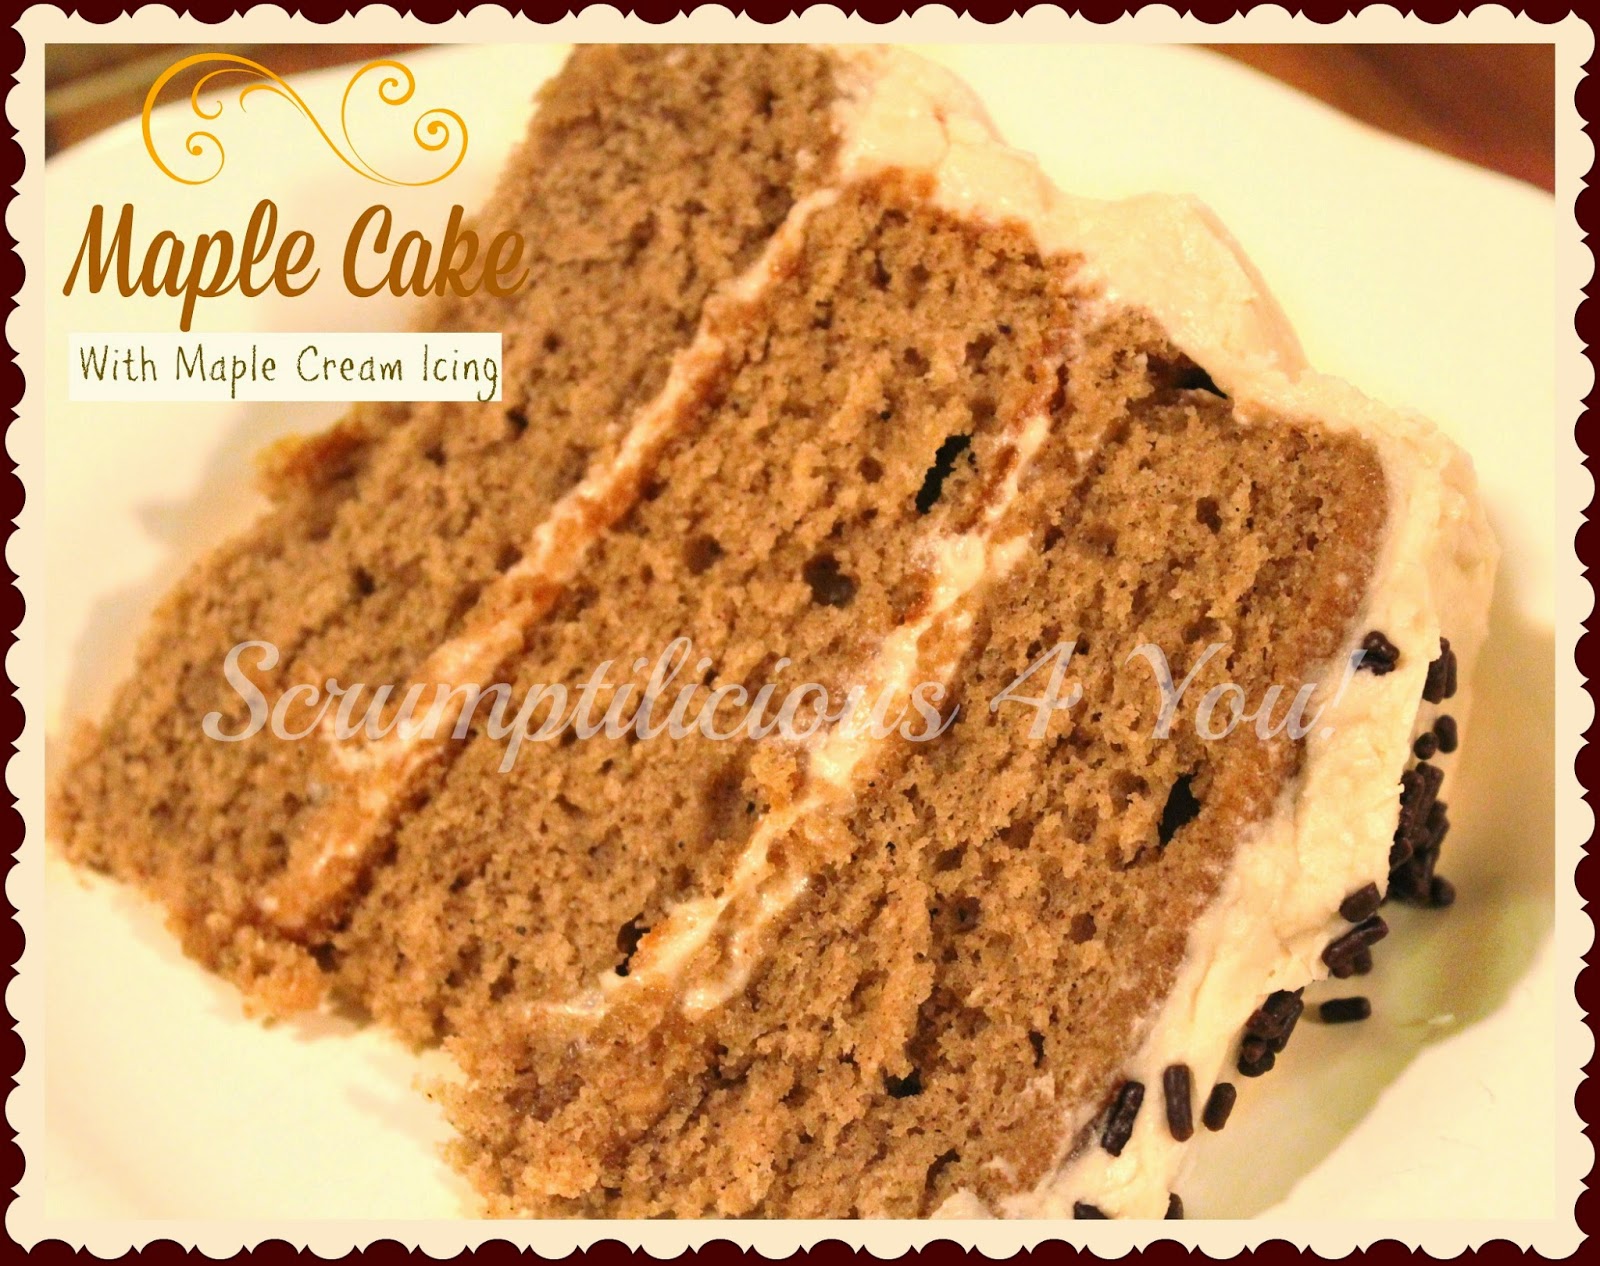
Maple Cake with Maple Cream Icing!

Maple Cake with Maple Icing
     Hey all you Maple Lovers out there, here is one sweet cake for you!  My son who is away at college asked for a Maple Cake for his birthday.  He sent me a couple of recipes he liked and we used the best parts of both of them to come up with this moist delicious cake!  

     I was so pleased with the flavor and texture.  It was as light as a mix but completely homemade.  It was uncomplicated and dripping with maple and butter flavor.  I loved that the recipe we choose for the cake part had cinnamon and nutmeg for added flavor too.


Maple Cake


2 3/4 cups all purpose flour
1 1/2 teaspoons baking powder
1 1/2 teaspoons baking soda
1 1/4 teaspoon salt
1 teaspoon cinnamon
1/2 teaspoon nutmeg
3/4 cup butter, softened 
1 cup sugar
1/2 cup Maple syrup  (I used grade A dark amber)
3 eggs
1/2 teaspoon imitation maple flavoring
1 cup buttermilk (I used 1/4 cup powdered buttermilk plus 1 cup water) 

     Sift first 6 ingredients into a bowl.  Cream butter and sugar until light yellow and creamy.  Add maple syrup and beat until combined.  Add eggs one at a time and beat well each time.  Add flour mixture and buttermilk alternately until blended.  Add imitation maple flavoring. 

      Divide batter into 3 prepared 8 inch round pans evenly.  (I weighed mine).  Use this pan release for best results.  Your cakes will come out easily! I used Wilton Bake Strips here around my pans to help them come out with flat tops so you don't have to cut the tops off.  

      Bake 25 min. in a preheated 325 oven.  Cake is done when lightly touched in the center and it springs back.

     Cool for 10 minutes then remove to a wire rack to cool completely.


Maple Cream Icing


8 oz. cream cheese, softened
1/2 cup butter, softened
4 cups powdered sugar
2 Tablespoons Grade A Maple Syrup
1/2 teaspoon imitation Maple Flavoring

Whip cream cheese and butter until combined.  Add powdered sugar one cup at a time on slow speed.  Add flavorings and beat about one minute one medium speed.  Ice top of first layer and then add the next layer.  Repeat.  Ice the sides of the cake and garnish with chocolate sprinkles or curls.  


Here is my son enjoying his cake!  (He is so handsome!)

This recipe was shared on these wonderful sites!
Pint Sized Baker
Turn it up Tuesday
Memories by the Mile
Totally Talented Tuesdays
The Recipe Critic
Chef in Training
Create, Link, Inspire
A to Zebra Celebrations
Anyonita Nibbles
The Country Cook
Get Him Fed Fridays

Wednesday, March 26, 2014

The Party Has Started!!!

Four Seasons Blog Hop - Easy Life Meal & Party PlanningWelcome to the Four Seasons Blog Hop
A party where we can celebrate the greatness that each season brings to our lives.
Thank you to everyone who shared their wonderful creations last week and to all of you who are joining us new this week! 
Meet Our Hosts:
So Let's Get This Party Started!!Let's Get this Party Started Share your  food creations, gardening, clever projects, tablescapes, decorations, party themes, and inspirational knowledge ... Ok, you get the point.  Join us every Thursday (opens Wednesday evening at 6:00 pm CST). Please stay for awhile and show some love to the guests, join us in the fun and grab a button. 
Four Seasons Blog Button
We share your posts on a variety of social media and have features of the week! Be sure to follow our Four Seasons Board on Pinterest!  By participating in this linky party, you agree to have your posts shared on social media and Pinterest and to receive email and Google notifications for reminders about the party. If you don't want to receive notifications, please let us know.

FEATURED

Saturday, March 22, 2014

Easter Picture DIY


Easy Easter Art
     This Easter Art DIY can be made in minutes and is so pretty.  It has a beautiful message and is a wonderful gift too.  I made this last year when I needed a gift for some neighbors I visit and so after looking at pinterest this is what I came up with. 

      I love the song "I Know That My Redeemer Lives" it is so uplifting and so I loved this message for Easter that is shaped like an egg out of the words of the song. 

      I decided to frame it and picked up an 8 x 10 frame from the dollar store that was gold.  Then I headed to the craft store to buy some Easter colored paper that wouldn't detract from the message and really felt like Easter.  I found the scrapbook paper at Michael's and it made it all look great.  

     The message was printed from this site Click Here

      I copied it and then took the paper from the 8 x 10 frame that was used as a mat for a 5 x 7 picture size.  

     Take the mat and with a pencil, outline around the outside of the mat centering the song words in the 5 x 7 opening.  Be careful to get it level and evenly spaced in the center of the opening. Then cut around the pencil lines so it will fit the mat and frame.
DIY Easter Picture


Easter Craft

Next trace the opening on the back of your colored scrapbook paper.  Make a hole in the center of the paper and cut towards the corners so you can get exactly into the corner.  Then cut carefully on the straight lines around the opening.  

You can frame the song now and be finished or you can add an embellishment to the outside of the frame.  I think that this makes it so much more personal and cute. 

 I found out how to make the flowers on pinterest (of course)!  and they were really not hard at all.  I went back to provide a link for you but they have closed the site.  Rather than go through a long explanation that I have no pictures for, it would be easier for you to look at the many flowers ideas on pinterest like these: #1, #2, #3 and add one of them to your frame.  If you have questions about them please contact me and I will try to address them quickly. You could also add a purchased flower or any decoration you want. 

 That's all there is to it!  Have fun!

 This post was added to these wonderful sites!
What's Cooking With Ruthie 
Mandy's Recipe Box 
Pint Sized Baker 
Treasure Box Tuesday 
Meandering Mondays 
A Pinch of Joy 
Create Link Inspire 

Wednesday, March 19, 2014

The Party is ON!

Four Seasons Blog Hop - Easy Life Meal & Party PlanningWelcome to the Four Seasons Blog Hop
A party where we can celebrate the greatness that each season brings to our lives.
Thank you to everyone who shared their wonderful creations last week and to all of you who are joining us new this week!  New Changes - We are now using InLinkz and "More Linky Parties To Enjoy" is back and OPEN this week for party friends that missed the opportunity to add a link to a party you host/co-host. 
Meet Our Hosts:
So Let's Get This Party Started!!Let's Get this Party Started Share your  food creations, gardening, clever projects, tablescapes, decorations, party themes, and inspirational knowledge ... Ok, you get the point.  Join us every Thursday (opens Wednesday evening at 6:00 pm CST). Please stay for awhile and show some love to the guests, join us in the fun and grab a button. 
Four Seasons Blog Button
We share your posts on a variety of social media and have features of the week! Be sure to follow our Four Seasons Board on Pinterest!  By participating in this linky party, you agree to have your posts shared on social media and Pinterest and to receive email and Google notifications for reminders about the party. If you don't want to receive notifications, please let us know.

FEATURED

Four Seasons Blog Hop Features

More Linky Parties To Enjoy 
(LINK UP YOUR PARTY IF YOU ARE A HOST OR CO-HOST)!
Link Posts Above - Parties Below

Wednesday, March 12, 2014

Four Seasons Blog Hop - Easy Life Meal & Party PlanningWelcome to the Four Seasons Blog Hop

A party where we can celebrate the greatness that each season brings to our lives.


Meet Our Hosts:

So Let's Get This Party Started!!Let's Get this Party Started

Share your  food creations, gardening, clever projects, tablescapes, decorations, party themes, and inspirational knowledge ... Ok, you get the point.  Join us every Thursday (opens Wednesday evening at 6:00 pm). Please stay for awhile and show some love to the guests, join us in the fun and grab a button. 

Four Seasons Blog Button

We will share your posts in a variety of ways on Pinterest, Twitter, Facebook and Google Plus.  We will also have features of the week! Be sure to follow our Four Seasons Board on Pinterest!  By participating in this linky party, you agree to have your posts shared on social media and Pinterest and to receive email and Google notifications for reminders about the party. If you don't want to receive notifications, please let us know.

FEATURED

Four Seasons Blog Hop - Featured Posts


Amelia's Dessert - Chicken Rice
the Painted Apron - Healthy Homemade Velveeta
Stone Cottage Adventures - Tu - Tus
My Family Mealtime - White Pizza Recipe
Mommy on Demand - Copycat Chik-Fil-A Sandwich
Sour Dough Native - Slow Cooker Mulligatawny
The Pinterested Parent - Hit the Pause Button on Life


Last week we had so many awesome St. Patrick's Day posts we decided to feature them all in a special collection and pinned on the Four Seasons Pinterest Board and Easy Life Holiday Fun Board


CAN'T MISS ST. PATRICK'S DAY COLLECTION
Feature Button


Tuesday, March 11, 2014

Sour Cream Chicken Breast


Easy Sour Cream Chicken

     Sour Cream Chicken Breast is one of my most prized recipes!  My sister gave this to me many years ago and it still remains a favorite for family dinners, social dinners, and for company.  It is elegant yet simple to prepare.  I can't say enough about the flavor!  Juicy, perfect, and delicious  every time you make it!  

     One of the reasons why this is so tender and juicy is because it calls for bone-in chicken breast.  These tend to be quite large.  I try to buy the smallest piece I can but they still are pretty big.  If you cook it until it is tender and done, you can usually make a cut across the cooked chicken to divide it in half to make smaller portions.  This takes some practice to make it look good if it is for company to cut it in the right place where it will slide off the bone.  Just try one when you aren't worried about the looks of it and you will quickly learn where to cut.

Sour Cream Chicken Breast


Ingredients:


6-8 Bone in Chicken Breast (I used 4 in this recipe to fit into 1 13 x 9 pan)
1 Cup Sour Cream
2 Tablespoons Lemon Juice
1 Teaspoon Salt
1/2 Teaspoon Season Salt
1/4 Teaspoon Paprika
1/8 Teaspoon Garlic Salt

 Combine all ingredients except for the chicken in a large enough to dip the chicken breasts in.

Dip the chicken one at a time and place in a 13 x 9 pan.  Cover pan with plastic wrap and refrigerate at least 4 hours (or overnight).  


     When ready to cook uncover chicken and sprinkle with dried bread crumbs (about 3/4 cup). I make my own by putting a couple of slices of bread in a paper sack and leaving them to dry for about a week.
    When I need them I just take the bread out and crush with a meat mallet in a plastic bag.  I think this is much cheaper and easier than buying them at the store and I always have some on hand this way.  

     Now take between 2 to 4 Tablespoons butter and melt it in a cup in the microwave.  Drizzle the chicken with it. 
Cover the pan completely with foil and place in the oven.
   Cook at 325 Degrees for 1 and 1/2 hours.  If you want the chicken to brown, remove the foil the last 1/2 hour of cooking time. 

  This is gonna taste great!


 This recipe was shared on these wonderful sites!
Totally Tasty Tuesdays 
Whimsy Wednesdays 
Wake up Wednesdays 
Whats Cooking Love? 
Buns In My Oven 
Plucky's Second Thought 
Ladies Only Blog Share 
The Better Baker 
Hungry Harps 
Inspire Me Monday 

Wednesday, March 5, 2014

Mandarin Orange Chicken


I love recipes that you can cook in just a few minutes in the microwave.  This recipe is delicious and only takes 11 to 15 minutes to cook!!  Unbelievable?  No.  This is made with simple ingredients and prep time is short also.  It is a tempting dish to serve to company and won't heat up your kitchen on hot summer days.  Wonderful flavor!  
Microwave Chicken

15 minute Mandarin Orange Chicken

4-6 boneless chicken breast pieces (1 -1 1/2 lbs chicken) 
2 Tablespoons Brown Sugar
2 Tablespoons Cornstarch
1/2 cup Teriyaki Sauce
1/4 cup Apple Juice
1 Tablespoon Vegetable Oil
1 Garlic clove (Minced)
1 can (11 oz.) Mandarin Oranges
Hot Cooked Rice
2 Green Onions (chopped)


In a small bowl combine the brown sugar and cornstarch. Then mix in the next 4 ingredients.  Open the can of mandarin oranges and drain the juice into the sugar mixture. If your chicken breasts are thick, pound them with a mallet until they are about 1/2 inch thick, then put them in a 13 x 9 microwavable dish. 
Pour the juice mixture over the top of the chicken and cover it with plastic wrap.   Microwave on high for 8 minutes.  Carefully pull back the plastic wrap, watching that the steam doesn't burn you  and turn the chicken pieces over in the dish to coat them with sauce.  Reposition the plastic wrap and cook 3-5 minutes longer until sauce is thickened.  Sprinkle onions and oranges over the top to garnish.
Serve over hot rice
Yield 4-6 Servings

This recipe was shared with these wonderful sites!
Get Him Fed 
The Country Cook 
Inspire Me Monday 
Pint Size Baker 
Treasure Box Tuesday 
Tasty Tuesdays