Showing posts with label Cookies. Show all posts

Tuesday, February 10, 2015

Valentine Petit Fours Cheater Style!!

Petit Fours easy recipe
When you find out how easy these really are to make you will be amazed and delighted!  I have tried a few petit four recipes in my time and none were what I would call fast or easy.  With all purchased ingredients they come together in minutes (except for the chilling time) and after resting overnight they taste like you slaved all day making and cutting tiny cakes to dip in white frosting.  This recipe is adapted from Snackworks.com. 

First, I will apologized for the recipe amounts.  The amounts are close to what is needed but vary a little with how much you leave on and in the middle of the cakes.  I just kept dipping and adding jam and chocolate until they were all finished.  This is how I did it.


Valentine Petit Fours -Cheater Style!!


1 Box Vanilla Wafers (I used Nilla)
24 oz. White Almond Bark (White Chocolate would be even better!)
1/2 cup Raspberry Jam or Cake Filling
Valentine Decorating Hearts and Sprinkles

Decide whether you want to make double layer or triple layer cakes or a combination of each. Count out the number of bottom layers you can make and set them on a wax paper lined cookie sheet flat side down. 


Add a small amount of raspberry jam (I used cake filling I had on hand) to the flat side of each remaining wafer and set one or two (dbl or triple) on top of the cookies that are on the cookie sheet.   I did like the doubles because they were easier to eat.


     Set the cookie sheet in the fridge for 4 to 6 hours to chill until firm enough to dip.  I actually put mine in the freezer for a half hour and they were fine.  As they warmed up the last few started to slide so you may want to only take a few out at a time to dip. 

     Melt the Almond Bark as the directions direct.  Please watch carefully to make sure you don't get it too hot.  Stop heating as soon as or even a little before the chunks are completely melted.  Then stir until smooth.  Set the cookies on a fork and lower into the Almond Bark until fully covered.  Lift them out and tap gently on the side of the cup to loosen the extra candy off, then swipe the bottom of the fork across the cup and set the cake on the wax paper to set up.  After every other one is dipped, add your sprinkles or decorations before the candy sets up.


     I was disappointed when I tried one of these right after they set up because they were so crunchy and hard to cut and eat.  I took them to the other aides I work with at school the next day ready to tell them they were not that great.  As I ate one I was so happy to see that letting them sit overnight had softened the inside to a cake consistency and they were delicious!  The filling was fun too.  I do wish I would have added a little more filling so I will try it that way next time. 

 I think these would be great for not only Valentine's Day but Wedding Showers or other nice events!  Have fun with these and Please!!! drop a note or a picture if you try these and let me know how you liked them!  Thanks for dropping by!

This post was shared with these great sites!

Wednesday Roundup
Wonderful Wednesday Blog Hop
 A Dish of Daily Life      
The Country Cook 
Pretty Pintastic Party 
Inspire Me Monday 


Tuesday, January 21, 2014

Ultimate Grasshopper Cookies!

Mint Chocolate Cookies
     Can you even look at that without your mouth watering?  If you look closely you will see chocolate chips in the deep chocolate cookie and you might also notice that the chocolate on top is melted semi-sweet chocolate with butter added to give it creamy soft melt in your mouth goodness!  Then the mint...oh the mint!  This really is the Ultimate!

     You don't have to wait any longer because I will give you the recipe right now.  And you can rest easy because these are very easy to make in fact they start with a shhhhhh!  (Cake mix).  We don't have to let that little secret out now do we?  

       I have to say that when I found these cookies on Your Cup of Cake I had reason to celebrate.  I was looking for a cookie that would be fancy enough for a friends wedding. We  also needed one that had  mint color in it because that is one of the wedding colors.  This cookie fit the bill and is one of my new favorite cookies too! The flavor is amazing! Thanks Lizzy from Your Cup of Cake!  I did make a couple of changes in the frosting and adapted the recipe somewhat so here it is!

Ultimate Grasshopper Cookies

1 box Duncan Hines Dark Chocolate Fudge Cake Mix (16.5 oz).
2 eggs (room temperature- set in a cup of warm water for 5 minutes)
1/2 cup real butter - melted
1 teaspoon vanilla
2 Tablespoons brown sugar
1 cup milk chocolate chips

     Mix all ingredient together in a bowl with a spoon.  Use a medium cookie scoop to form dough and place 2" apart on a silpat mat or parchment paper placed on a cookie sheet.  Cook 9 to10 minutes and remove promptly.  Cool until firm enough to move to a cooling rack.  This will produce a cookie that is firm and slightly flat.  I like this because it makes a good surface
to put all the layers of icing and chocolate topping and mints.


*** If you like a rounder, softer cookie do not melt the butter but instead bring it to room temperature and add it that way.  Also do not add the brown sugar, it makes the cookie spread more and the cookie will be more rounded if you leave it out. I made this recipe both ways doing everything else exactly the same.  Here are the results:


American Buttercream Frosting

2/3 cup Crisco shortening
1/3 cup butter (room temperature)
1 lb. powdered sugar (approx. 4 cups)
1 teaspoon vanilla (good quality)
1 1/2 teaspoons peppermint extract
2 to 3 Tablespoons milk
green food coloring (I used Wilton leaf green paste) 

     Whip butter and shortening with a wisk attachment until smooth and light yellow.  (about 1 minute).  Change to paddle attachment. 

Add 1 cup pdr. sugar and mix it in.  Add another cup pdr sugar and mix it in. 
Add vanilla and peppermint.  
Add 1 Tablespoon milk and mix. 
Add 2 more cups pdr. sugar beating each in separately.  
Add one more Tablespoon milk and mix. 
Add amount of food coloring desired and mix. 
Add remaining milk if you want your icing to be thinner.  (I only add 2 total Tablespoons of milk).   
Cover icing bowl with a damp towel until ready to use.  Recipe from Glorious Treats.


Chocolate Topping

1 1/2 cup Semi sweet Chocolate Chips. (I used Costco 80% Cacao semi sweet chips)
1/4 cup butter

Melt both together in the microwave in a bowl.  Start with heating on high for 30 seconds and then stir.  Continue heating and stirring every 15 seconds until smooth .


homemade mint chocolate cookie


After cookies have completely cooled, use a decorating bag and round tip to pipe the mint icing onto the cookie leaving about 1/8 to 1/4 inch of the cookie top showing around the outside border.  Use a knife to spread the icing evenly but leave the outside ring untouched so that it is smooth and even.  When chocolate has cooled to just warm use a spoon to set a small amount on top.  Spread with a knife leaving about 1/8 inch border of green icing.  Sprinkle Andes Mints pieces on top while chocolate is still tacky but not too warm or mints will melt.
cake mix cookies
This recipe has been shared on the following sites:


Anyonita's Nibbles
Kitchen Meets Girl
The Recipe Critic
Smart School House
What's Cookin Love?
Buns in My Oven
Made in a Day
Epic Mommy Adventures
The Country Cook
Totally Tasty Tuesdays

Wednesday, December 18, 2013

Cherry Pie Cookies

Christmas Cookies
I really love the melt in your mouth buttery flavor of these cookies!  I found them on the Recipe Critic's site.  She does some amazing stuff!  I loved the red and white colors for Christmas.  They are also great because they whip up in no time and taste elegant with the white chocolate drizzle on top! 
All you do is mix the dough quickly with your mixer, then dish it out on parchment lined pans with a medium cookie scoop.  Add canned cherry pie filling and bake.  Drizzle with melted candy almond bark and you have one amazing cookie!  Here are the ingredients:


  • ½ cup butter, softened
  • ½ cup margarine, softened
  • 2 cups flour
  • ¾ cup powdered sugar
  • 1 tsp vanilla
  • 21 ounce Cherry Pie Filling
  • ½ cup white chocolate baking chips or white almond bark
 To find the directions for preparing these wonderful cookies click here:    Cherry Pie Cookies
 (I doubled the dough and it was about perfect for using the whole can of cherries!)

What is your favorite Christmas Cookie Recipe???

This recipe was shared on these great sites! 
My Personal Accent 
A Pinch of Joy 
I should be mopping the floor 

Monday, April 22, 2013

Samoas To Die For!!!

Heaven knows I've tasted a lot of cookies in my life.  Some I like and some I like more.  I meet very few cookies I don't like.  In fact cookie monster is a not so very distant relative of mine.  But.... I can honestly say these cookies are so good you may cry when you eat one.  They may be just a little addictive so you may want to be sure to have lots of people around in a party or something to eat them to save you from yourself.  If you like the Girl Scout version you are going to LOVE these!  


Cookie Center

1 cup Butter (softened)
1/2 cup sugar
2 cups flour
1/4 tsp. baking powder
1/2 tsp salt
2 Tblspn. Milk (optional)
1/2 tsp. Vanilla

 Begin by creaming the butter and sugar together for one to two minutes until it changes to a light color and is fluffy.

 Mix the flour, salt and baking powder in a bowl and then add it slowly to the butter mixture until well blended.  Add vanilla and then only add milk if the dough won't come together in a ball.  Mine did not need any at all.
Gather dough in a ball and divide into two.  Wrap each ball in plastic wrap and chill for about an hour.  Then remove and work a little with your hands until it is pliable enough to roll out. 

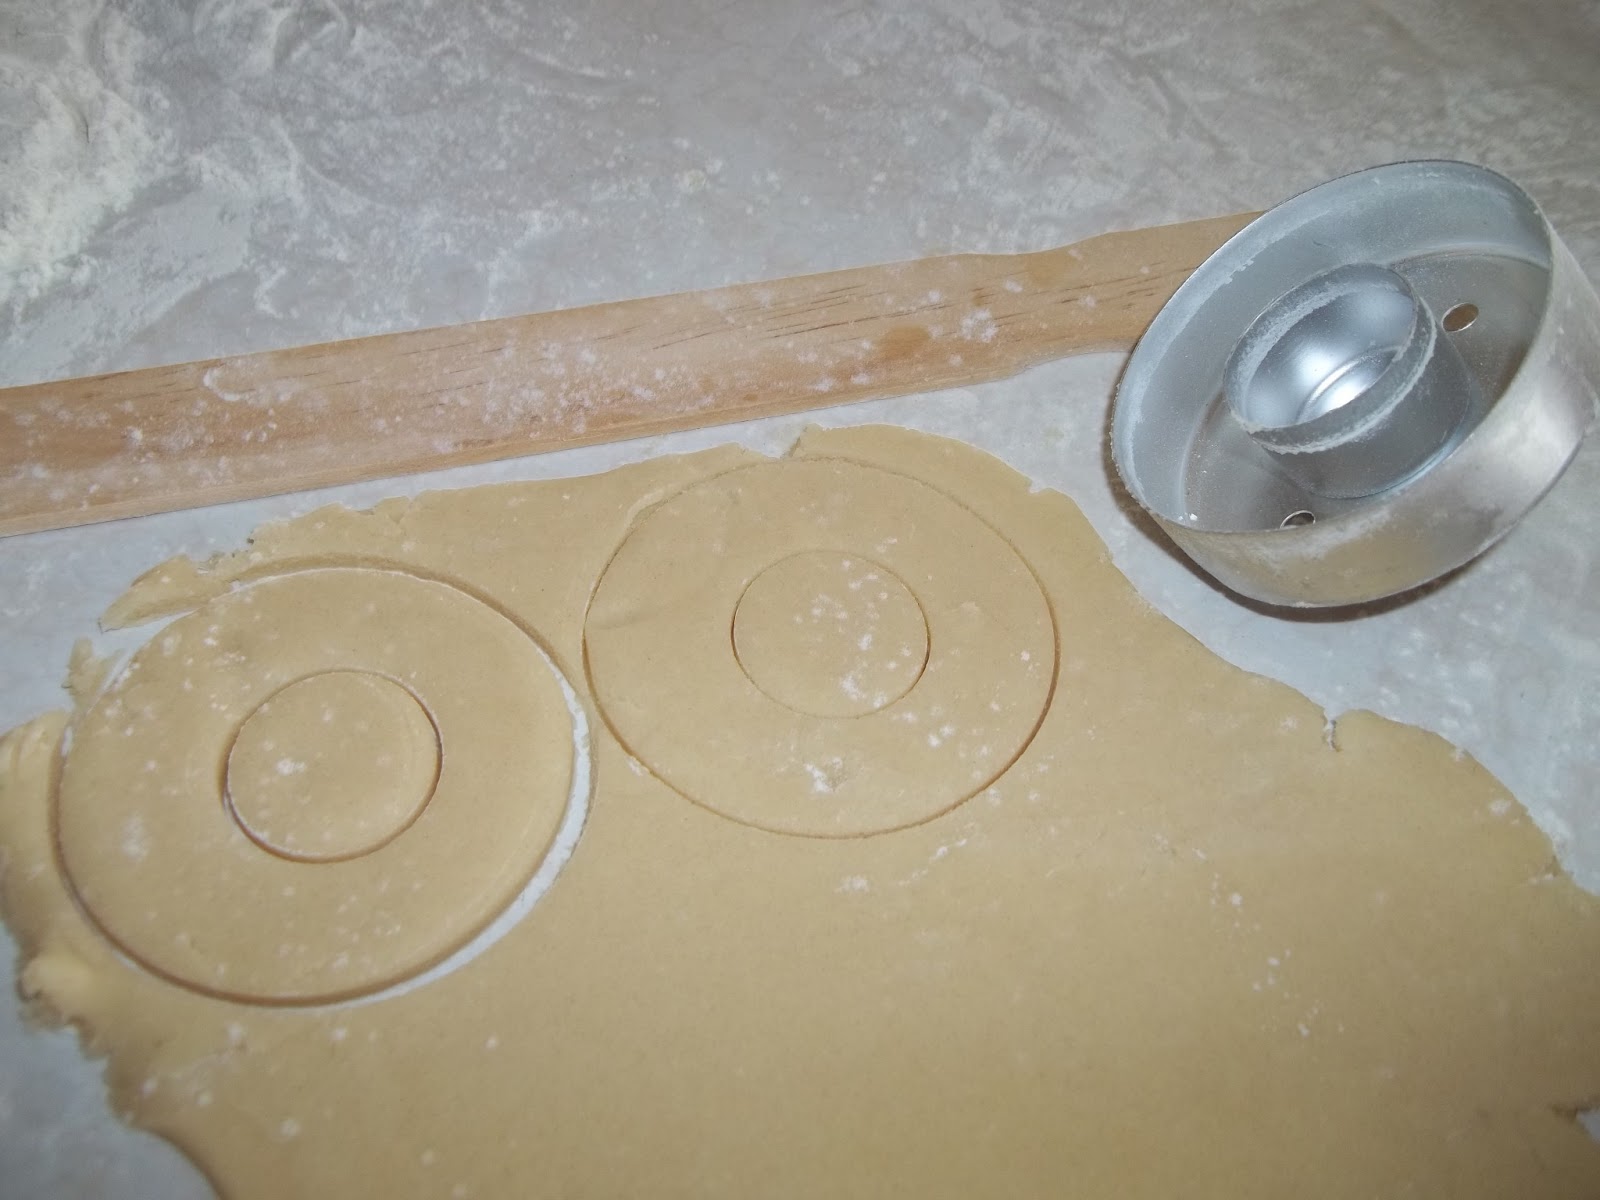
 Lightly flour the counter surface and roll to about 1/8" thickness.  I like to use two new paint sticks under the rolling pin to make sure it is very even. 
 Cut out your cookies with a 1 1/2" to 2" circle and about a 1" inner circle.  Any cutters will do but it was nice to do it in one step with my doughnut cutter.

 Place them on a cookie sheet with a silpat liner or parchment paper and cook at 350 for 10 to 12 min. until the bottom of the cookies are a very light golden brown.  Cool slightly on the pan and then remove to a cooling rack to finish.

Topping

3 cups shredded sweetened coconut 
15 ounces carmel (individually wrapped store brand is fine)
1/4 tsp. salt
3 Tblspn. milk
1 1/3 to 2 1/2 cups dark chocolate chips ( I used Costco- Kirkland Brand and they were excellent!)


Preheat oven to 300 degrees.  Place coconut evenly on a parchment lined baking sheet.   Toast for 20 minutes, stirring every 5 minutes to ensure even browning.  Watch carefully because it browns quickly and could burn.  Cool on baking sheet stirring if browning continues.  Set aside.


 Place caramel in a large microwave- safe bowl with milk and salt.  Cook on high for 3-4 min. stopping  and stirring every minute to melt carmels.  When smooth, fold in coconut.  When mixture is very warm it will spread easily on the top of the cookies and it will stick to the cookies without any problem.  If it cools too much it will come off.  If this occurs, reheat the mixture in the microwave a little until it is soft and sticks well again.  Using the tip of your butter knife, take a teaspoon at a time and stick it on the top of the cookie. Moving around the circle quickly with small amounts of topping will work better than trying to push it around and spread it out. 

 Set cookies on a rack for the topping to cool and set up.  Meanwhile, place chocolate chips in a microwave safe bowl and heat in 30- 45 second increments until it is melted and smooth. 
 Holding a cookie, dip the bottom into the chocolate. Using a metal spatula scrap the extra chocolate off leaving a smooth even covering on the bottom of about 1/8" inch.  Place on a cookie sheet lined with wax paper or parchment paper.  Then when all the cookies finished place remaining chocolate into a small ziplock bag and cut a tiny corner off.  Use this to place lines of chocolate across the cookies.
 Let cookies cool until completely set.  (You can put them in the fridge to hurry this process for 15 minutes but leaving them longer may make the chocolate turn white.)  This recipe made 28-2" cookies.

 These are as wonderful as they look!  


This recipe was adapted from Just a Taste and Orson Gygi's Blog.  
It was seen on The Recipe Critic,Chef in Training,Buns in my oven and Mandy's Recipe Box.

Wednesday, February 13, 2013

Sooo Cute Cookies!

Gingerbread Cookies

Are these just the cutest cookies ever?  I fell in love with them the minute I saw them here on sweetapolita's blog.  She makes the most amazing sweets if you haven't been there before use the link above to visit now!!    You can get the complete instructions by following the link but this is a picture of mine and some of the small changes that I did that worked for me.  Sweetapolita makes hers very large - an  8 x 11 size.  They are super cute but I wanted my one recipe of dough to go further so I copied and used the template she provides as it is without enlarging it,  (see link) which came out about to be about 6" x 7 1/2".  I used mine to take to children in my church Primary goup to welcome them to a new year of classes.  I also added a toothpick with a flag taped to it in the cookie's hand that said "Welcome to our class!" They loved them.  This would also make a fun birthday party invite or treat to take home. 

I pretty much followed the recipe with a couple of exceptions.  I used regular brown sugar and regular molasses (unsulphered) because I already had those on hand. I also wanted to keep the flavor a little more on the mild side.  She also provides a link to show how to make the royal icing and how to get the right consistancy.  I actually had to add more powdered sugar to get it to a "toothpaste" consistancy.  I used tip #3 for the lines, and tip #199 for the cheeks.  I used Americolor pink for the nose and cheeks, making the nose a little darker with the same color.  I used Skittles for the buttons!  Have fun!

Tuesday, August 28, 2012

S'More's Cookie Bars and a Dedication!


This is an exciting day for me!  This is my first opportunity to share wonderful recipes with anyone I can talk into visiting. I hope you will love cooking them as much as I do.  This first post is dedicated to my sister who gave me the recipe (it was only mildly adapted).  She was one of the first in my life to introduce me to the fun and creative world of cooking.  
Thanks, Peggy!

So here goes!


S'Mores Cookie Bars
1 cup butter, softened                         2 cups flour               
1 1/2 cups packed brown sugar       2 cups graham cracker crumbs (12 crackers)
2 eggs, beaten                                     1 tsp. baking powder
                                                                1/4 tsp. salt 

2 cups marshmallow cream
2 cups milk chocolate chips
1-2 cups mini marshmallows 


Preheat oven to 350. Line a 9x13 inch pan with foil leaving a 2-inch overhang on the ends.  Spray with cooking spray.  Soften butter in microwave for a few seconds on defrost.


In a large bowl, using an electric mixer, beat butter and sugar until light and creamy, about 2 minutes.  Beat in eggs until combined.  


Reduce mixer speed then slowly beat in dry ingredients (flour, graham cracker crumbs, baking powder and salt) that have been combined in a separate bowl. 


Divide dough in half

                                Press dough into pan until dough is flat and uniform

                                       Spread marshmallow topping over the dough 


                   Sprinkle chocolate chips and mini marshmallows evenly on top of that.


                                          Scatter remaining dough on top in clumps. 


 Don't worry about covering the top, the marshmallows and chocolate chips should peek through.  Bake until golden brown.  


                           About 30 - 35 minutes.  Cool completely.  Remove from pan.


                                       Peel off foil and cut into bars.  Eat some now! 


This recipe linked to Mandy's Recipe Box ,  lil' luna
 Back for Seconds
High Heels and Grills
Smart School House

<div align="center"><a href="http://www.smartschoolhouse.com" title="Smart School House"><img src="http://i1251.photobucket.com/albums/hh541/laderadixon/WW2_zps4b3fbfc4.jpg" alt="Smart School House" style="border:none;" /></a></div><div align="center"><a href="http://www.smartschoolhouse.com" title="Smart School House"><img src="http://i1251.photobucket.com/albums/hh541/laderadixon/WW2_zps4b3fbfc4.jpg" alt="Smart School House" style="border:none;" /></a></div>