I think it about time for something kind of exotic don't you? Every once in a while you just need to get out of your comfort zone and try something exciting. I want to help you with that....Say to yourself, "I can do this." It will be worth it, trust me. When you eat this you may even need to play some Chinese music in the back ground and close your eyes and imagine that you are at an expensive restaurant. It won't be hard because this is really that good!
I have tried to break it down to small steps because it is a little more involved than some recipes. Not hard, just more to do. You may even want to do the chopping the night or morning before if you are pressed for time before dinner. The basic recipe comes from Betty Crocker's Sizzling Stir-Fries book but I have made several changes. Don't let the ingredients scare you. I found them all at my local supermarket and this turns out with a little kick but you can easily control the ingredients to make it any level of heat you like. This recipe is quite mild.
First:
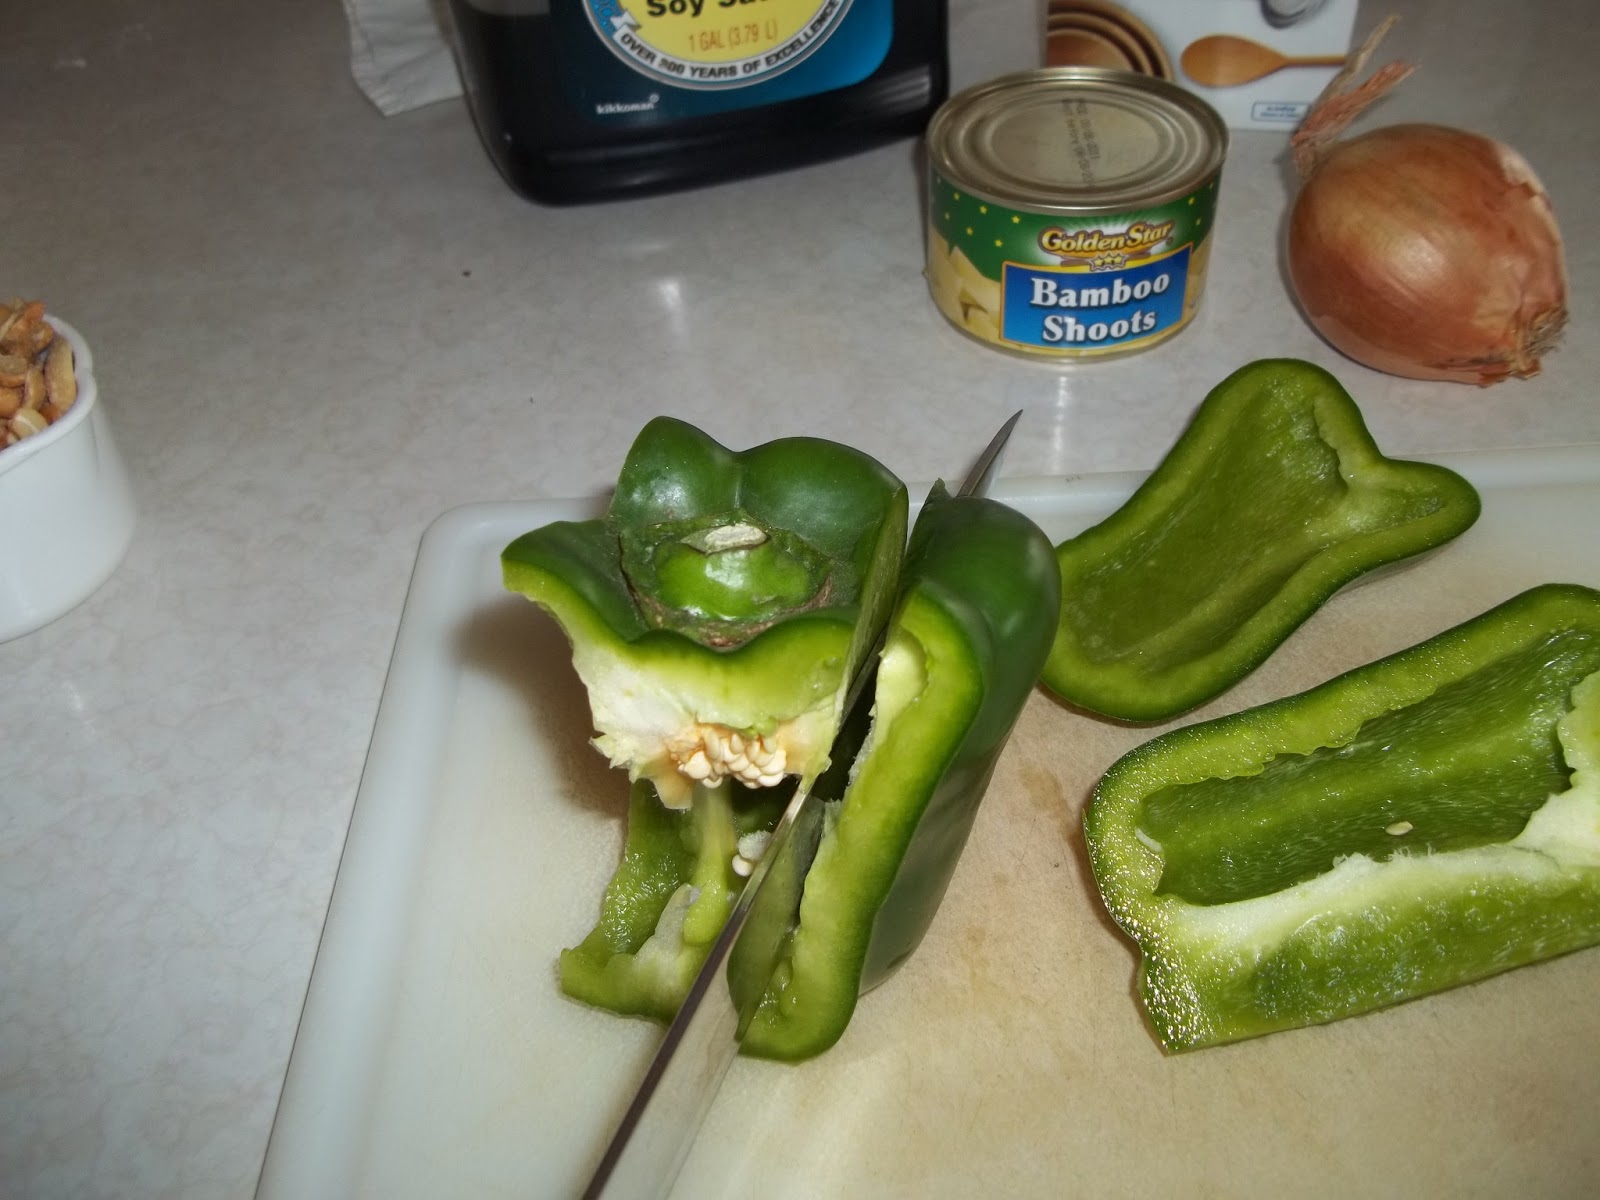
Chop green pepper into 3/4 inch pieces. It is easier if you cut the sides of the pepper off the main part, then the seeds stay attached and can be easily discarded.
Slice the onion from top to bottom until you have 8 wedges.
Drain the bamboo shoots and then cut into 1/2 inch pieces.
This could be done the night before if you like.
Cut the chicken breast into 3/4 inch cubes and put into a medium bowl.
This could be done a few hours before but make sure the chicken is never left out at room temperature for very long.
If you are doing this ahead of time, you can cover the veggies and refrigerate and cover the raw chicken and refrigerate.
When you are ready to cook;
Mix together until blended in a small bowl or cup: 1 egg white
1 teas. cornstarch
1 teas. soy sauce
Dash of white pepper (opt.)
Take out chicken cubes and stir in the egg white mixture then return to fridge for 20 minutes.
In another small bowl mix together: 1 Tablespoon cornstarch
1 Tablespoon water
1 Tablespoon soy sauce
Now this is the important part that will make this so much easier. You will want to gather all your ingredients around the stove. (Also gather any family members and/or loved ones that you want to impress with your astute knowledge of exotic cooking procedures so they can ooooh and ahhh with each addition.)
You should have separately measured and ready:
Chicken in bowl with a separate plate to hold cooked chicken later
veggies
cornstarch mixture in a bowl
cashews and a plate with paper towel to drain them on
vegetable oil
ginger
chicken broth
chile paste in a measuring spoon
hoisin sauce and
sweet chili sauce
All in separate containers. You should look like the test kitchen lady now with little bowls all around you ready to make this look like it is really cinchy to throw together!
It is much easier to make this when everything is close at hand. The pan will be very hot so take care that nothing is too close but within easy reach. Sadly, I do not own a wok so I just used my 12" non stick fry pan and it worked just fine. Also, you may notice that my ingredients are not all in separate bowls, learn from my experience and it will be easier for you!
Now :
Heat wok/pan until quite hot. Add 2 Tblspn. oil and move pan around to coat bottom.
Add cashews: stir-fry 1 minute or until cashews are light brown. Pour them onto the waiting paper toweled plate.
Add chicken to pan; stir-fry until chicken turns white and no pink remains inside. Remove chicken from pan to a waiting plate.
Add 2 Tblspn. oil again to pan. Add onion pieces, bell pepper, and ginger root/ginger. Cook until onion and pepper are tender crisp then add chicken, bamboo shoots, sweet chili sauce, hoisin sauce and chile paste, stir-fry one minute. Add broth; heat to boiling. Stir in cornstarch mixture; cook and stir 20 seconds or until thickened.
Stir in cashews and top with chopped green onion if desired. It is amazing, I promise!!
Just makes you want to get your chopsticks out doesn't it?
Sichuan Chicken with Cashews
1 1/2 lb boneless chicken breast
1 egg white
1 tsp cornstarch
1 tsp soy sauce
Dash of white pepper
1 large green bell pepper
1 med. onion
1 8 1/2 oz can sliced bamboo shoots, drained
1 Tblspn. cornstarch
1 Tblspn. cold water
1 Tblspn. soy sauce
4 Tblspns. vegetable oil, divided
1 cup cashews (I used canned salted cashews)
1 tsp. finely chopped gingeroot (I used 2 tsp. ground ginger)
4 Tblspn. hoisin sauce
6 Tblspn. Sweet Chili Sauce (for chicken)
1/4 to 1/2 tsp. chile paste ( I used a rounded 1/4 tsp.)
1/4 cup chicken broth
chopped green onion for garnish (opt)
Heat wok/pan until quite hot. Add 2 Tblspn. oil and tilt pan to coat bottom.
Add cashews: stir-fry 1 minute or until cashews are light brown. Pour them onto the waiting paper toweled plate.
Add chicken to pan;
stir-fry until chicken turns white and no pink remains inside. Remove
chicken from pan to a waiting plate.
Add
2 Tblspn. oil again to pan. Add onion pieces, bell pepper, and ginger
root/ginger. Cook until onion and pepper are tender crisp then add
chicken, bamboo shoots, sweet chili sauce, hoisin sauce and chile paste,
stir-fry one minute. Add broth; heat to boiling. Stir in cornstarch
mixture; cook and stir 20 seconds or until thickened.
Stir in cashews and top with chopped green onion if desired
This recipe was linked to Totally Tasty Tuesdays with Mandy's Recipe Box ,
Kitchen Meets Girl, and lil luna
Ragu Enchiladas
Not long ago there was a car commercial on TV that made a joke about selling Italian tacos. It sounds like a strange combination doesn't it? I kind of laughed until I realized that one of my families favorite meals from their growing up years (that I created myself!) is Ragu Enchiladas!!! It may sound unlikely but these enchiladas are a staple around my house. My son even makes them now that he lives away at college and loves, loves them! It has been kind of a secret family recipe for years. But since we are such good friends I will share them with you. Don't blame me if your kids ask for them for their birthday dinner.
One important thing to remember when you buy ingredients is that the sauce does matter. I did fall into the trap of buying store brand sauces for a better price. I suddenly didn't like these anymore and couldn't figure out why. Even different flavors of Ragu make a difference. I try to buy the tomato, garlic and onion flavor. It just has the right flavor. Others are good too and you can try them out at your own risk!
So start with Ragu, sour cream, 1 to 1 1/2 lbs cooked ground beef, grated cheddar cheese, and 10 enchilada size tortillas.
Lay the shells out separately on a clean counter. Divide the meat between the 10 enchilada shells. Add small dollops of sour cream on top of the meat.
Then sprinkle with cheddar cheese.
Roll up and place in a 9 x 13 pan. I put 8 and then
place the last 2 lengthwise on the edge of the pan.
Pour Ragu sauce in a 4 cup measuring cup and then add about 1/2-3/4 cup water to the bottle and shake to combine with the sauce t that didn't pour out. I use about 3/4 cup but you may like it thicker).
Pour this into the measuring cup and stir to thin the sauce a little.
Pour Ragu sauce on top to cover.
Use a knife to pull the dry shell away from the side and fill with sauce.
Sprinkle liberally with cheese.
Then cover and cook at 350 degrees for 30 min. in the oven or cover with plastic wrap and microwave for 7 to 10 min on high until middle is hot and sauce is bubbly.
Then because it is usually just the two of us for dinner, I wrap some up and freeze them to send back to college for my son.
Enjoy!
You saw this Ragu Enchiladas recipe first on Scrumptilicious 4 You!
This was linked to Buns in my oven. and Kitchen meets girl,High Hills and Grills,lil luna
I have to apologize for leaving you for so long! I know it was not great but...I do have an explanation. I was asked to make a wedding cake about a month ago and need I say more?
I am far from being an accomplished wedding cake maker but it has been a dream of mine for, well, about my whole life. I bought pans, looked at sensational pictures and dreamed of the day when I would be good enough to make one like "that". Well, the day came and I still wasn't prepared. But I looked at the pictures of some simple cakes and thought "How hard could it be?" I was about to find out....
I wasn't concerned about finding a wonderful cake recipe because I have one that I have used many times on large one layer cakes. It turns out beauuutifully. Then I was told that due some manufacturer changes in ingredients that my recipe was failing. And I was told that by some pretty wonderful accomplished wedding cake makers. Oh dear! So I spent a few sleepless nights wondering what to do. And with some help from my niece, Hil and her sister who makes cakes a lot it all worked out.
There is a lot of good advice out there on the web and I believe I probably read about 13 million hours (I never exaggerate!) of it just to be sure that I was ready for any possibility. You just can't take chances on someone's wonderful, most special day in the world can you? It was a fun, nerve wracking, tiring, exciting and beautiful time all in one. In the end I was just super relieved and proud that it all came together (and also that I didn't drop it or trip with it.) Here are some of the highlights in pictures of the process.
If you are interested in learning from my experiences about all the steps and neat tricks I learned, please comment below and I will do a complete tutorial on making a Wedding Cake.
Here are some of pictures of the finished product!
Thanks for your patience. I will be blogging again very soon!